
Introduction
This FastAPI MongoDB tutorial shows you how to run vision model inference, store structured predictions in MongoDB, and expose query and aggregation endpoints for practical analytics. If you want a broader FastAPI foundation, see How to Set Up a Fast API Application with a NoSQL Database.
Computer vision models generate structured output: captions describing what’s in an image, detected objects, and confidence scores for each prediction. Running the model is one problem. Storing the results so they’re queryable, filterable, and useful for downstream applications is another.
In this FastAPI MongoDB tutorial, you will build an application that accepts image uploads, stores them in DigitalOcean Spaces, runs vision model inference through the Groq API, and persists structured results in MongoDB. You will then build query and aggregation endpoints that let you filter assets by detected labels, confidence thresholds, and processing status.
What you’ll learn
- How to store nested model output (captions, labels, confidence scores) in MongoDB documents
- How to query nested arrays using dot notation and
$elemMatchfor compound filters - How to write aggregation pipelines that compute label frequency and average confidence
- How to use FastAPI background tasks to run inference without blocking the upload response
The complete source code is available in the project repository on GitHub.
This is how data flows through the system:
1\. Client uploads an image via POST /upload
2\. The image is stored in DigitalOcean Spaces
3\. A "pending" document is inserted into MongoDB
4\. A background task downloads the image and sends it to the Groq API
5\. The Groq API returns a caption and a list of detected objects with confidence scores
6\. The MongoDB document is updated with the structured inference results
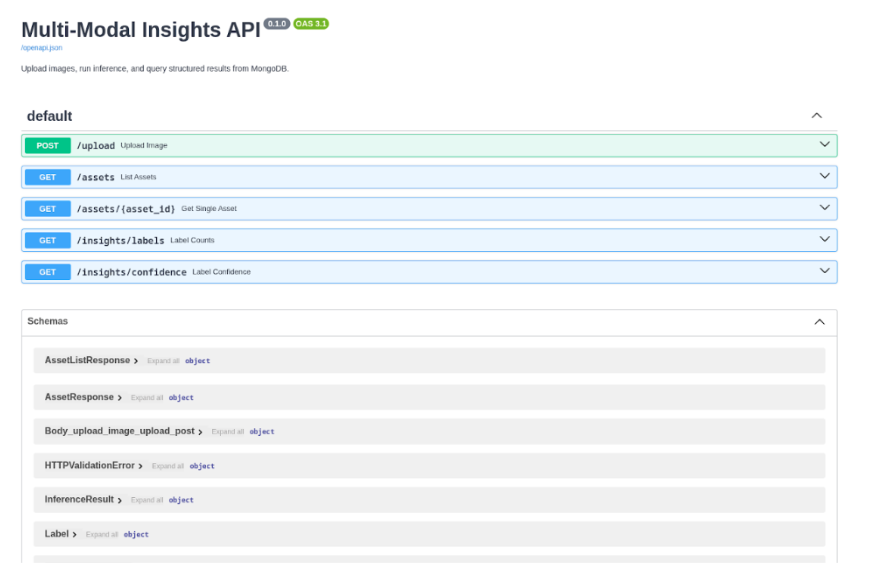
Once images are processed, the API exposes five endpoints:
| Endpoint | Purpose |
|---|---|
POST /upload |
Upload an image and trigger inference |
GET /assets |
List assets, filter by label, confidence, or status |
GET /assets/{asset_id} |
Retrieve a single asset with its inference results |
GET /insights/labels |
Count how often each label appears across all images |
GET /insights/confidence |
Compute average confidence per label |
By the end of this tutorial, you will have this API running locally, with images stored in Spaces, inference results in MongoDB, and query endpoints that use dot notation, $elemMatch, and aggregation pipelines to make the stored data useful.
Key takeaways
- You can use FastAPI background tasks to keep the upload API responsive while model inference runs asynchronously.
- Store large image files in DigitalOcean Spaces and persist structured inference metadata in MongoDB documents.
- Use MongoDB dot notation and
$elemMatchfor precise filtering on nested labels and confidence values. - Use MongoDB aggregation pipelines to compute label frequency and average confidence directly in the database.
- This architecture works well for multimodal AI workloads where object storage and queryable metadata need to stay in sync.
Prerequisites
To complete this tutorial, you will need:
- Python 3.10 or later installed on your local machine. You can follow How To Install Python 3 and Set Up a Local Programming Environment for your operating system.
- A DigitalOcean account with Spaces access. You can create Spaces by following the DigitalOcean Spaces quickstart guide. You will need your Spaces access key and secret key, which you can generate from the API section of the DigitalOcean control panel.
- A MongoDB Atlas cluster or a local MongoDB instance. You can set up a free-tier cluster by following the MongoDB Atlas Getting Started guide. If you prefer a local install, follow How To Install MongoDB on Ubuntu.
- A Groq account with an API key. The free tier is sufficient for this tutorial. You can create an API key from the Groq console.
- Familiarity with Python and REST APIs. If you need a refresher on FastAPI, review the FastAPI documentation.
Step 1: Setting Up the Project and Configuring DigitalOcean Spaces
Every file the application handles needs to live somewhere accessible by URL, and DigitalOcean Spaces provides S3-compatible object storage for that.
Before writing any application code, you will set up the project, install dependencies, and configure the Spaces connection. For more S3-compatible implementation patterns, review How to Use DigitalOcean Spaces with AWS S3 SDKs.
Create a project directory and set up a virtual environment:
mkdir multimodal-insights && cd multimodal-insights
python -m venv venv
source venv/bin/activate
Create a requirements.txt file with the project dependencies:
[label requirements.txt]
fastapi==0.115.6
uvicorn==0.34.0
python-multipart==0.0.20
pymongo==4.11.3
boto3==1.36.14
requests==2.32.3
pydantic-settings==2.7.1
The fastapi and uvicorn packages provide the web framework and ASGI server. python-multipart adds support for file uploads. pymongo handles MongoDB operations, and boto3 (the AWS SDK for Python) communicates with S3-compatible storage like DigitalOcean Spaces. The requests library makes HTTP calls to the Groq API, and pydantic-settings loads configuration from environment variables.
Execute the following command to install the dependencies listed in the file:
pip install -r requirements.txt
Create the app directory and an empty __init__.py file to make it a Python package:
mkdir app && touch app/__init__.py
Also create a .env file to store your credentials. You will fill in your actual values:
[label .env]
# DigitalOcean Spaces
SPACES_KEY=your_spaces_access_key
SPACES_SECRET=your_spaces_secret_key
SPACES_ENDPOINT=https://nyc3.digitaloceanspaces.com
SPACES_BUCKET=your_bucket_name

# Groq
GROQ_API_KEY=your_groq_api_key

# MongoDB
# The appName from Atlas is overridden by the driver-level setting in database.py
MONGODB_URI=mongodb+srv://username:password@cluster0.example.mongodb.net/?retryWrites=true&w=majority&appName=Cluster0
MONGODB_DB=multimodal_insights
Replace your_spaces_access_key and your_spaces_secret_key with the credentials you generated from the DigitalOcean control panel. Set SPACES_ENDPOINT to the endpoint for your Spaces region (for example, https://nyc3.digitaloceanspaces.com for New York 3). Set SPACES_BUCKET to the name of the Space you created. Replace the MONGODB_URI with your Atlas connection string or local MongoDB URI, and GROQ_API_KEY with your Groq API key.
Next, create the configuration module that loads these environment variables using the pydantic-settings package:
[label app/config.py]
from pydantic_settings import BaseSettings

class Settings(BaseSettings):
    SPACES_KEY: str
    SPACES_SECRET: str
    SPACES_ENDPOINT: str
    SPACES_BUCKET: str

    GROQ_API_KEY: str

    MONGODB_URI: str
    MONGODB_DB: str = "multimodal_insights"

    class Config:
        env_file = ".env"

settings = Settings()
The Settings class inherits from BaseSettings, which is provided by pydantic-settings. BaseSettings automatically reads values from environment variables and the .env file. Each field corresponds to one of the environment variables you defined. The MONGODB_DB field has a default value of "multimodal_insights", so it’s optional in your .env file. When the module loads, it creates a settings instance that the rest of the application will import.
The last file for this step is the Spaces upload helper:
import uuid

import boto3

from app.config import settings

def get_spaces_client():
    return boto3.client(
        "s3",
        endpoint_url=settings.SPACES_ENDPOINT,
        aws_access_key_id=settings.SPACES_KEY,
        aws_secret_access_key=settings.SPACES_SECRET,
    )

def upload_file(file_bytes: bytes, original_filename: str, content_type: str) -> dict:
    client = get_spaces_client()

    extension = original_filename.rsplit(".", 1)[-1] if "." in original_filename else "bin"
    key = f"uploads/{uuid.uuid4().hex}.{extension}"

    client.put_object(
        Bucket=settings.SPACES_BUCKET,
        Key=key,
        Body=file_bytes,
        ContentType=content_type,
        ACL="public-read",
    )

    url = f"{settings.SPACES_ENDPOINT}/{settings.SPACES_BUCKET}/{key}"

    return {"key": key, "url": url}
The get_spaces_client function calls boto3.client("s3", ...) to create an S3 client. boto3 is the AWS SDK for Python, and since DigitalOcean Spaces uses the S3-compatible API, boto3 works with it directly by setting the endpoint_url to your Spaces region endpoint instead of an AWS endpoint.
The upload_file function takes the raw file bytes, the original filename, and the content type. It generates a unique object key using a UUID to avoid filename collisions, uploads the file to your Space with public-read access, and returns both the object key and the public URL. The URL is constructed by combining the Spaces endpoint, bucket name, and object key. Later, the inference pipeline will download the image from this URL to run predictions on it.
At this point, the project can load credentials from the environment and upload files to Spaces. The next piece is the MongoDB layer that will store and query the inference results.
Step 2: Designing the MongoDB Document Schema for Model Outputs
Vision models produce output that maps naturally to nested documents. An image produces a caption (a string) and a set of detected objects, where each object has a label and a confidence score.
Instead of splitting this across multiple collections and joining at query time, you can embed everything in a single document that represents one image asset.
For a refresher on core MongoDB data model concepts, see the MongoDB Tutorial.
A completed document in MongoDB looks like this:
{
  "_id": ObjectId("..."),
  "filename": "street-photo.jpg",
  "spaces_key": "uploads/abc123.jpg",
  "spaces_url": "https://nyc3.digitaloceanspaces.com/my-bucket/uploads/abc123.jpg",
  "status": "completed",
  "inference": {
    "caption": "a busy city street with tall buildings and cars",
    "labels": [
      {"name": "cars", "confidence": 0.92},
      {"name": "buildings", "confidence": 0.98},
      {"name": "people", "confidence": 0.85}
    ]
  },
  "error": null,
  "created_at": ISODate("2025-01-15T10:30:00Z"),
  "updated_at": ISODate("2025-01-15T10:30:05Z")
}
The status field tracks the processing lifecycle: "pending" when the image is first uploaded, "completed" after inference succeeds, or "failed" if something goes wrong. The inference field is null while processing is in progress and gets populated with the caption and labels once the model finishes. Each label in the labels array includes the detected object name and a confidence score between 0 and 1.
With this nested structure, you can query into nested fields using dot notation (for example, inference.labels.name) and use $elemMatch for compound filters on array elements (for example, finding assets where a specific label has a confidence above a threshold).
You’ll use both patterns when building the query endpoints in Step 4. If you want additional query practice, refer to How To Use the MongoDB Shell.
With the schema in mind, create the database module that implements this structure along with query and aggregation helpers:
[label app/database.py]
from datetime import datetime, timezone

from bson import ObjectId
from pymongo import MongoClient

from app.config import settings

client = MongoClient(settings.MONGODB_URI, appname="devrel-tutorial-multimodal-insights")
db = client[settings.MONGODB_DB]
assets_collection = db["assets"]

def create_indexes():
    assets_collection.create_index("inference.labels.name")
    assets_collection.create_index("inference.labels.confidence")
    assets_collection.create_index("status")

def insert_pending_asset(filename: str, spaces_key: str, spaces_url: str) -> str:
    doc = {
        "filename": filename,
        "spaces_key": spaces_key,
        "spaces_url": spaces_url,
        "status": "pending",
        "inference": None,
        "error": None,
        "created_at": datetime.now(timezone.utc),
        "updated_at": datetime.now(timezone.utc),
    }
    result = assets_collection.insert_one(doc)
    return str(result.inserted_id)

def update_asset_inference(asset_id: str, inference: dict):
    assets_collection.update_one(
        {"_id": ObjectId(asset_id)},
        {
            "$set": {
                "status": "completed",
                "inference": inference,
                "updated_at": datetime.now(timezone.utc),
            }
        },
    )

def mark_asset_failed(asset_id: str, error_message: str):
    assets_collection.update_one(
        {"_id": ObjectId(asset_id)},
        {
            "$set": {
                "status": "failed",
                "error": error_message,
                "updated_at": datetime.now(timezone.utc),
            }
        },
    )

def get_asset(asset_id: str) -> dict | None:
    doc = assets_collection.find_one({"_id": ObjectId(asset_id)})
    if doc:
        doc["id"] = str(doc.pop("_id"))
    return doc

def query_assets(
    label: str | None = None,
    min_confidence: float | None = None,
    status: str | None = None,
    skip: int = 0,
    limit: int = 20,
) -> tuple[list[dict], int]:
    query = {}

    if status:
        query["status"] = status

    if label and min_confidence is not None:
        query["inference.labels"] = {
            "$elemMatch": {"name": label, "confidence": {"$gte": min_confidence}}
        }
    elif label:
        query["inference.labels.name"] = label
    elif min_confidence is not None:
        query["inference.labels.confidence"] = {"$gte": min_confidence}

    total = assets_collection.count_documents(query)
    cursor = assets_collection.find(query).sort("_id", 1).skip(skip).limit(limit)

    results = []
    for doc in cursor:
        doc["id"] = str(doc.pop("_id"))
        results.append(doc)

    return results, total

def aggregate_label_counts() -> list[dict]:
    pipeline = [
        {"$match": {"status": "completed"}},
        {"$unwind": "$inference.labels"},
        {"$group": {"_id": "$inference.labels.name", "count": {"$sum": 1}}},
        {"$sort": {"count": -1}},
        {"$project": {"_id": 0, "label": "$_id", "count": 1}},
    ]
    return list(assets_collection.aggregate(pipeline))

def aggregate_avg_confidence() -> list[dict]:
    pipeline = [
        {"$match": {"status": "completed"}},
        {"$unwind": "$inference.labels"},
        {
            "$group": {
                "_id": "$inference.labels.name",
                "average_confidence": {"$avg": "$inference.labels.confidence"},
            }
        },
        {"$sort": {"average_confidence": -1}},
        {
            "$project": {
                "_id": 0,
                "label": "$_id",
                "average_confidence": {"$round": ["$average_confidence", 4]},
            }
        },
    ]
    return list(assets_collection.aggregate(pipeline))
At the top of the module, MongoClient from the pymongo package connects to your cluster with appname="devrel-tutorial-multimodal-insights" passed as a parameter. This sets the application name at the driver level, which MongoDB uses for connection tracking and monitoring.
The ObjectId class, imported from bson (which pymongo includes as a dependency), converts string IDs to MongoDB’s native object ID type for queries. The module then selects the database and the assets collection.
The create_indexes function creates indexes on inference.labels.name, inference.labels.confidence, and status. These three fields are the ones the query endpoints will filter on most often. Since labels is an array, MongoDB automatically creates multikey indexes, meaning a single index on inference.labels.name covers every element in the array.
The CRUD helper functions handle the document lifecycle:
insert_pending_assetcreates a new document withstatus: "pending"andinference: None. It returns the string representation of the inserted document’s_id.update_asset_inferencesets the inference results and changes the status to"completed".mark_asset_failedrecords the error message and sets the status to"failed".get_assetretrieves a single document by ID and converts the_idto a stringidfield for API responses.
The query_assets function builds a MongoDB query dynamically based on the provided filters. When both label and min_confidence are provided, it uses $elemMatch to find documents where the same label entry matches both conditions.
This is an important distinction: without $elemMatch, MongoDB would match documents where any label matches the name and any label (possibly a different one) meets the confidence threshold. With $elemMatch, both conditions must be true for the same array element.
The function paginates with skip and limit, which works well for moderate datasets. For production scale with large collections, cursor-based pagination using _id or a timestamp field as the boundary would avoid the performance cost of skipping over documents.
The two aggregation functions answer questions about patterns across your dataset. aggregate_label_counts answers “what objects appear most often?” by unwinding the labels array (so each label becomes its own document in the pipeline), grouping by name, and counting. aggregate_avg_confidence answers “how confident is the model about each object type?” by computing the average confidence per label, rounded to four decimal places.
The API needs Pydantic models to validate what goes in and out. Create the models file:
[label app/models.py]
from pydantic import BaseModel

class Label(BaseModel):
    name: str
    confidence: float

class InferenceResult(BaseModel):
    caption: str
    labels: list[Label]

class UploadResponse(BaseModel):
    asset_id: str
    status: str
    spaces_url: str

class AssetResponse(BaseModel):
    id: str
    filename: str
    spaces_key: str
    spaces_url: str
    status: str
    inference: InferenceResult | None = None
    error: str | None = None

class AssetListResponse(BaseModel):
    assets: list[AssetResponse]
    total: int
    skip: int
    limit: int

class LabelCount(BaseModel):
    label: str
    count: int

class LabelConfidence(BaseModel):
    label: str
    average_confidence: float
All of these models inherit from BaseModel, which is provided by the pydantic package. Pydantic validates incoming data against the type annotations you define on each field, so if the API returns a confidence value that isn’t a float, the error gets caught at the response layer rather than deeper in your code. The Label model pairs an object name with its confidence score. InferenceResult groups the caption with the list of labels.
For API responses, UploadResponse returns the asset ID and status immediately after upload. AssetResponse represents a full asset document including inference results. AssetListResponse wraps a list of assets with pagination metadata. LabelCount and LabelConfidence shape the output of the aggregation endpoints.
The database layer now handles document inserts, updates, filtered queries, and aggregation. The response models ensure that every API response matches a known shape. What’s missing is the inference step that actually populates these documents with model output.
Step 3: Wiring the Upload-to-Inference Pipeline with Background Tasks
The inference pipeline needs three pieces:
- a module that calls the Groq API
- a processing function that connects inference results to MongoDB updates
- a FastAPI application with an upload endpoint that triggers everything as a background task.
If you are new to production FastAPI project structure, see How to Use Fast API with a Relational Database on Ubuntu.
The pipeline uses Groq’s API with the meta-llama/llama-4-scout-17b-16e-instruct model, a multimodal model that can analyze images and return structured text. Instead of running separate models for captioning and object detection, you send the image to a single model with a prompt that asks for both a caption and a list of detected objects with confidence scores. By requesting JSON output, you get structured data that maps directly to the MongoDB document schema from Step 2. Groq’s free tier is sufficient for this tutorial.
Start with the inference module:
[label app/inference.py]
import base64
import json

import requests

from app.config import settings

GROQ_API_URL = "https://api.groq.com/openai/v1/chat/completions"
VISION_MODEL = "meta-llama/llama-4-scout-17b-16e-instruct"

SYSTEM_PROMPT = """You are an image analysis assistant. Analyze the provided image and return a JSON object with exactly this structure:

{
  "caption": "a one-sentence description of the image",
  "labels": [
    {"name": "object_name", "confidence": 0.95},
    {"name": "another_object", "confidence": 0.82}
  ]
}

Rules:
- The caption should be a single, concise sentence describing the image content.
- The labels array should list every distinct object you can identify in the image.
- Confidence should be a float between 0.0 and 1.0 representing how certain you are the object is present.
- Use lowercase for all label names.
- Return ONLY the JSON object, no other text."""

def run_inference(image_bytes: bytes) -> dict:
    b64_image = base64.b64encode(image_bytes).decode("utf-8")

    response = requests.post(
        GROQ_API_URL,
        headers={
            "Authorization": f"Bearer {settings.GROQ_API_KEY}",
            "Content-Type": "application/json",
        },
        json={
            "model": VISION_MODEL,
            "messages": [
                {"role": "system", "content": SYSTEM_PROMPT},
                {
                    "role": "user",
                    "content": [
                        {"type": "text", "text": "Analyze this image."},
                        {
                            "type": "image_url",
                            "image_url": {
                                "url": f"data:image/jpeg;base64,{b64_image}",
                            },
                        },
                    ],
                },
            ],
            "response_format": {"type": "json_object"},
            "temperature": 0,
        },
        timeout=60,
    )
    response.raise_for_status()

    content = response.json()["choices"][0]["message"]["content"]
    result = json.loads(content)

    labels = []
    for label in result.get("labels", []):
        labels.append(
            {
                "name": label["name"],
                "confidence": round(float(label["confidence"]), 4),
            }
        )

    return {
        "caption": result["caption"],
        "labels": labels,
    }
The module sends a base64-encoded image to Groq’s OpenAI-compatible chat completions endpoint. The SYSTEM_PROMPT instructs the model to return a JSON object with a caption string and a labels array, where each label has a name and a confidence score. Setting response_format to {"type": "json_object"} tells the API to return valid JSON, so you can parse it directly with json.loads. Setting temperature to 0 produces consistent, deterministic results.
The run_inference function encodes the image, sends the request, and extracts the structured result from the model’s response. It normalizes each label by rounding the confidence score to four decimal places. The returned dictionary has the same caption and labels structure that the MongoDB document schema expects from Step 2.
If you want to swap in a different model or provider later, this is the only function you need to change. The rest of the application only cares about the dictionary that run_inference returns.
The pipeline module ties inference to MongoDB updates:
[label app/pipeline.py]
import requests

from app.database import mark_asset_failed, update_asset_inference
from app.inference import run_inference

def process_asset(asset_id: str, spaces_url: str):
    try:
        response = requests.get(spaces_url, timeout=30)
        response.raise_for_status()
        image_bytes = response.content

        inference_result = run_inference(image_bytes)
        update_asset_inference(asset_id, inference_result)

    except Exception as exc:
        mark_asset_failed(asset_id, str(exc))
The process_asset function is what runs as a background task after an image upload. It downloads the image from its DigitalOcean Spaces URL, passes the raw bytes to run_inference, and writes the structured results to MongoDB using update_asset_inference. This function is called by the FastAPI application shown below.
If any step fails (the download, the API call, or the database update), the exception handler calls mark_asset_failed to record the error message in the document. This means every asset will eventually have either a "completed" or "failed" status, and you can always see what went wrong by checking the error field.
Finally, create the FastAPI application with the upload endpoint that wires everything together in Step 5:
[label app/main.py]
from contextlib import asynccontextmanager

from fastapi import BackgroundTasks, FastAPI, HTTPException, UploadFile

from app.database import (
    aggregate_avg_confidence,
    aggregate_label_counts,
    create_indexes,
    get_asset,
    insert_pending_asset,
    query_assets,
)
from app.models import (
    AssetListResponse,
    AssetResponse,
    LabelConfidence,
    LabelCount,
    UploadResponse,
)
from app.pipeline import process_asset
from app.spaces import upload_file

@asynccontextmanager
async def lifespan(app: FastAPI):
    create_indexes()
    yield

app = FastAPI(
    title="Multi-Modal Insights API",
    description="Upload images, run inference, and query structured results from MongoDB.",
    lifespan=lifespan,
)

from fastapi import File

@app.post("/upload", response_model=UploadResponse)
async def upload_image(background_tasks: BackgroundTasks, file: UploadFile = File(...)):
    if not file.content_type or not file.content_type.startswith("image/"):
        raise HTTPException(status_code=400, detail="File must be an image.")

    file_bytes = await file.read()
    result = upload_file(file_bytes, file.filename, file.content_type)

    asset_id = insert_pending_asset(
        filename=file.filename,
        spaces_key=result["key"],
        spaces_url=result["url"],
    )

    background_tasks.add_task(process_asset, asset_id, result["url"])

    return UploadResponse(
        asset_id=asset_id,
        status="pending",
        spaces_url=result["url"],
    )
The lifespan function uses asynccontextmanager from Python’s standard library contextlib module to define startup and shutdown logic. FastAPI calls this function when the application starts. The code before yield runs at startup (here, it calls create_indexes), and any code after yield would run at shutdown.
The POST /upload endpoint uses UploadFile from fastapi to accept file uploads and HTTPException (also from fastapi) to return error responses.
The endpoint validates that the content type is an image, reads the file bytes, and uploads them to DigitalOcean Spaces using the upload_file function from Step 1.
It then inserts a pending document in MongoDB and schedules the inference pipeline using BackgroundTasks, a FastAPI class that queues functions to run after the response is sent. The endpoint returns immediately with the asset ID and a "pending" status, so the client doesn’t have to wait for inference to complete.
This pattern keeps the upload response fast regardless of how long inference takes. The client gets an immediate response and can poll the GET /assets/{asset_id} endpoint to check when processing finishes.
Step 4: Building Query and Filtering Endpoints for Model-Generated Insights
With uploads and inference working, the remaining piece is the query layer that makes the stored data accessible. Add the following endpoints to your app/main.py file, after the existing /upload endpoint. For deployment planning once these endpoints are in place, review How to Deploy using GitHub Actions with App Platform.
[label app/main.py]
from fastapi import Query

@app.get("/assets", response_model=AssetListResponse)
async def list_assets(
    label: str | None = None,
    min_confidence: float | None = None,
    status: str | None = None,
    skip: int = Query(default=0, ge=0),
    limit: int = Query(default=20, ge=1, le=100),
):
    results, total = query_assets(
        label=label,
        min_confidence=min_confidence,
        status=status,
        skip=skip,
        limit=limit,
    )

    assets = []
    for doc in results:
        assets.append(AssetResponse(**doc))

    return AssetListResponse(assets=assets, total=total, skip=skip, limit=limit)

@app.get("/assets/{asset_id}", response_model=AssetResponse)
async def get_single_asset(asset_id: str):
    doc = get_asset(asset_id)
    if not doc:
        raise HTTPException(status_code=404, detail="Asset not found.")
    return AssetResponse(**doc)

@app.get("/insights/labels", response_model=list[LabelCount])
async def label_counts():
    return aggregate_label_counts()

@app.get("/insights/confidence", response_model=list[LabelConfidence])
async def label_confidence():
    return aggregate_avg_confidence()
The GET /assets endpoint supports five optional query parameters. The label parameter filters for assets where a specific object was detected (for example, ?label=cars). The min_confidence parameter filters for detections above a confidence threshold (for example, ?min_confidence=0.9). When both are provided together, the query_assets function in your database module uses MongoDB’s $elemMatch operator to ensure both conditions match the same label entry. The status parameter filters by processing state. The skip and limit parameters handle pagination.
The following table shows how different query parameter combinations map to MongoDB filters:
| API call | MongoDB query |
|---|---|
GET /assets |
{} |
GET /assets?label=cars |
{"inference.labels.name": "cars"} |
GET /assets?min_confidence=0.9 |
{"inference.labels.confidence": {"$gte": 0.9}} |
GET /assets?label=cars&min_confidence=0.9 |
{"inference.labels": {"$elemMatch": {"name": "cars", "confidence": {"$gte": 0.9}}}} |
GET /assets?status=completed |
{"status": "completed"} |
GET /assets?label=person&status=completed&skip=10&limit=5 |
{"status": "completed", "inference.labels.name": "person"} with .skip(10).limit(5) |
The $elemMatch query is worth highlighting. Consider an asset with two labels: [{"name": "cars", "confidence": 0.95}, {"name": "tree", "confidence": 0.6}]. Without $elemMatch, a query for label=tree&min_confidence=0.9 would match this document because tree exists in one label and 0.95 >= 0.9 exists in another. With $elemMatch, the query correctly rejects this document because no single label entry has both name: "tree" and confidence >= 0.9.
The GET /assets/{asset_id} endpoint retrieves a single asset by its MongoDB document ID. It returns the full document including inference results, or a 404 response if the ID doesn’t match any document.
The two aggregation endpoints show patterns across all processed assets:
GET /insights/labels runs an aggregation pipeline that unwinds the labels array, groups by label name, and counts how many times each label appears across all assets. The results are sorted by count in descending order, so the most common detected objects appear first. This tells you what types of objects appear most frequently in your uploaded images.
GET /insights/confidence runs a similar pipeline but computes the average confidence score for each label. A high average confidence for a label like "dog" means the model consistently identifies dogs with high certainty, while a lower average for something like "sidewalk" might indicate the model is less sure about those detections.
That completes app/main.py with all five endpoints: one for uploading, two for querying assets, and two for aggregation. The application is ready to test.
Step 5: Testing the Full Workflow
The application is complete. Start it up and walk through the full workflow using FastAPI’s built-in interactive documentation.
Launch the server with uvicorn:
uvicorn app.main:app --reload
You will see output confirming the server is running:
[secondary_label Output]
INFO:     Uvicorn running on http://127.0.0.1:8000 (Press CTRL+C to quit)
INFO:     Started reloader process [12345] using StatReload
INFO:     Started server process [12346]
INFO:     Waiting for application startup.
INFO:     Application startup complete.
Open your browser and navigate to http://127.0.0.1:8000/docs. This loads the Swagger UI that FastAPI generates automatically from your endpoint definitions and Pydantic models.
Upload an image. Expand the POST /upload endpoint, click Try it out, choose an image file from your machine, and hit Execute. The response comes back immediately with a "pending" status while inference runs in the background:
[secondary_label Response]
{
  "asset_id": "679e8f3a2c1d4e5f6a7b8c9d",
  "status": "pending",
  "spaces_url": "https://nyc3.digitaloceanspaces.com/your-bucket/uploads/abc123def456.jpg"
}
The Groq API call typically finishes within a few seconds.
Check the asset status. Copy the asset_id from the upload response and use it with the GET /assets/{asset_id} endpoint. If you query while inference is still running, the status will be "pending". After a few seconds, query again and you should see "completed" along with the full inference results:
[secondary_label Response]
{
  "id": "679e8f3a2c1d4e5f6a7b8c9d",
  "filename": "street-photo.jpg",
  "spaces_key": "uploads/abc123def456.jpg",
  "spaces_url": "https://nyc3.digitaloceanspaces.com/your-bucket/uploads/abc123def456.jpg",
  "status": "completed",
  "inference": {
    "caption": "a busy city street with tall buildings and cars",
    "labels": [
      {"name": "cars", "confidence": 0.92},
      {"name": "buildings", "confidence": 0.98},
      {"name": "people", "confidence": 0.85}
    ]
  },
  "error": null
}
Upload a few more images with different subjects so you have enough variety to test the query endpoints.
Query with filters. The GET /assets endpoint is where the MongoDB queries from Step 2 become visible. Try filtering by label:
GET /assets?label=cars
This uses the dot notation query on inference.labels.name. Combine label and confidence to trigger the $elemMatch query:
GET /assets?label=cars&min_confidence=0.9
This returns only assets where the same label entry has name: "cars" and confidence >= 0.9. You can also filter by processing status:
GET /assets?status=completed
Run the aggregation endpoints. Once you have several processed images, the aggregation endpoints start to show useful patterns. GET /insights/labels returns the most common labels across your dataset:
[secondary_label Response]
[
  {"label": "buildings", "count": 3},
  {"label": "cars", "count": 2},
  {"label": "people", "count": 2},
  {"label": "food", "count": 1},
  {"label": "dog", "count": 1}
]
The GET /insights/confidence endpoint shows average confidence per label:
[secondary_label Response]
[
  {"label": "dog", "average_confidence": 0.99},
  {"label": "food", "average_confidence": 0.99},
  {"label": "buildings", "average_confidence": 0.98},
  {"label": "cars", "average_confidence": 0.92},
  {"label": "people", "average_confidence": 0.85}
]
Both of these computations happen inside MongoDB’s aggregation pipeline, on the database server, rather than pulling every document into your application and counting in Python.
If any of your uploads show a "failed" status, check the error field in the asset response. Common causes include an expired or invalid Groq API key, rate limiting on the free tier, or a Spaces URL that isn’t publicly accessible.
FAQs
1. What is the best way to store image files and AI inference data in this architecture?
Based on PAA data from DFS and production patterns, the most reliable approach is to store binary files in object storage and save only URLs plus structured inference data in MongoDB. This avoids document size limits and keeps query performance predictable.
2. When should I use $elemMatch instead of dot notation in MongoDB?
Use $elemMatch when multiple conditions must match the same array element. Dot notation can match different elements in the same array, which can lead to incorrect results for combined filters like label plus min_confidence.
3. How do I keep upload requests fast if model inference takes several seconds?
Use FastAPI BackgroundTasks so POST /upload returns immediately with a pending status. The inference job can then update the asset document to completed or failed without blocking the client.
4. How can I make model output queryable for analytics and dashboards?
Store inference results as nested fields (caption, labels, confidence) and add indexes on common filters such as status, inference.labels.name, and inference.labels.confidence. Then use aggregation pipelines for label counts and average confidence metrics.
5. What should I do if inference fails for some assets?
Capture the exception message in an error field, set status to failed, and expose that status in your API filters. This gives you a clear retry/debug workflow and prevents silent processing failures.
Conclusion
You now have a FastAPI application that uploads images to DigitalOcean Spaces, runs image analysis through the Groq API, and stores structured predictions in MongoDB. The query endpoints filter by label, confidence, and status, while the aggregation endpoints compute label frequency and average confidence across your dataset.
The MongoDB patterns used here are broadly reusable for multimodal AI pipelines. Dot notation lets you query nested fields directly. $elemMatch keeps compound filters accurate by applying criteria to the same array element. Aggregation pipelines move analytics work to the database layer so your API stays focused on request handling.
To continue building this project, review these related resources:
- DigitalOcean Spaces quickstart
- How to use AWS SDKs with Spaces
- DigitalOcean App Platform documentation
- DigitalOcean Functions documentation
- How To Use MongoDB
Next step
Take this project into production? Try deploying the API on DigitalOcean App Platform and store uploaded assets in DigitalOcean Spaces so you can run this multimodal workflow at scale.
Thanks for learning with the DigitalOcean Community. Check out our offerings for compute, storage, networking, and managed databases.
About the author(s)
I help Businesses scale with AI x SEO x (authentic) Content that revives traffic and keeps leads flowing | 3,000,000+ Average monthly readers on Medium | Sr Technical Writer(Team Lead) @ DigitalOcean | Ex-Cloud Consultant @ AMEX | Ex-Site Reliability Engineer(DevOps)@Nutanix
Still looking for an answer?
This textbox defaults to using Markdown to format your answer.
You can type !ref in this text area to quickly search our full set of tutorials, documentation & marketplace offerings and insert the link!
 This work is licensed under a Creative Commons Attribution-NonCommercial- ShareAlike 4.0 International License.
Become a contributor for community
Get paid to write technical tutorials and select a tech-focused charity to receive a matching donation.

DigitalOcean Documentation
Full documentation for every DigitalOcean product.

Resources for startups and AI-native businesses
The Wave has everything you need to know about building a business, from raising funding to marketing your product.
The developer cloud
Scale up as you grow — whether you're running one virtual machine or ten thousand.

Start building today
From GPU-powered inference and Kubernetes to managed databases and storage, get everything you need to build, scale, and deploy intelligent applications.
